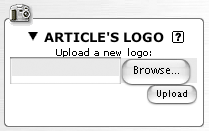
 To add a button, a box is provided in the left column of the article, under the title "ARTICLE’S LOGO".
With SPIP you can install a logo corresponding to the article. This way, it will be possible, in the public site, to display a graphic button linking to the article.
For an article, it is possible:
- not to use any logo;
- to install a simple graphical logo;
- to use an animated logo that supports "hovering" (a logo with "2 positions": the logo changes when the mouse hovers over it).
- Images formats
When you create your images (with your usual application), you must save them in one of the following formats:
- GIF (the GIF file could be an "animated GIF");
- JPEG;
- PNG (we advise against it because several browsers do not support it correctly).
In order to avoid serious operating errors, SPIP rejects image files bigger than 256 KB. Advice: because such "buttons" are elements of the graphical interface, make sure that their file size (in kilobytes) is not too big (generally, less than 10 KB) if you want your site navigation to remain fluid.
In particular, make sure that the names of your files have an extension indicating their formats: .gif, .jpg or .png. the file name itself is of no importance whatsoever provided that you do not forget the extension.
If you create a button which supports "hovering", create two different graphic files (one for the "normal" state of the button and another one that appears when the mouse hovers over the button): it is imperative, then, that the two files have the same size (in pixels).
- Simple logo (no hovering)
 To add a button, a box is provided in the left column of the article, under the title "ARTICLE’S LOGO".
Depending on your browser version, click on the button "Browse", "Select", "File"...which opens a dialogue box allowing you to select the graphic file corresponding to your button from your hard drive.
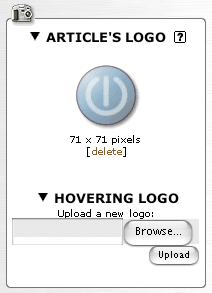
Once the file is selected, click on the button "Upload". Et voilà...! your button appears. It is followed by a button "Delete logo" that simply offers you to delete this logo.
If you do not plan to use a hovering logo, no more steps are needed.
- Replacing the logo
 You could wish to replace the logo with another file. This is achieved in two steps:
- start by "Deleting the logo": the previous box, containing the "Upload" button reappears;
- upload the new file, according to the procedure already described.
Due to the way browsers work, the image which is displayed then, is wrong, since it is in fact the previous version (the image is in the browser’s "cache"). Click on this image (with the right button of your mouse, or while pressing the "ctrl" key on the Macintosh) to show a contextual drop-down menu: select the option "Reload image". The new version of your logo will then appear.
- Logo for hovering
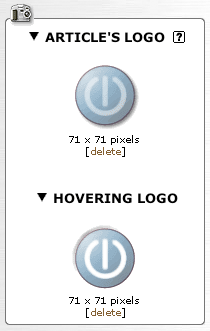
 After installing the first file, the box displays not only the logo you have just installed on the server, but adds to it a second box, entitled "HOVERING LOGO". It is in this box that you can select the second file aimed at the management of hovering.
If, after installing both files, you delete the first one (the "simple" button), the box of the second logo disappears. Indeed, in the absence of the first logo, there is no point in managing any hovering!
No intervention in the "text" of your article is necessary. At the time of the display on the public site, the management of the sections logos is entirely automated. The HTML code will be generated according to the size of the logo, and the hovering instructions in JavaScript will be created automatically as well.